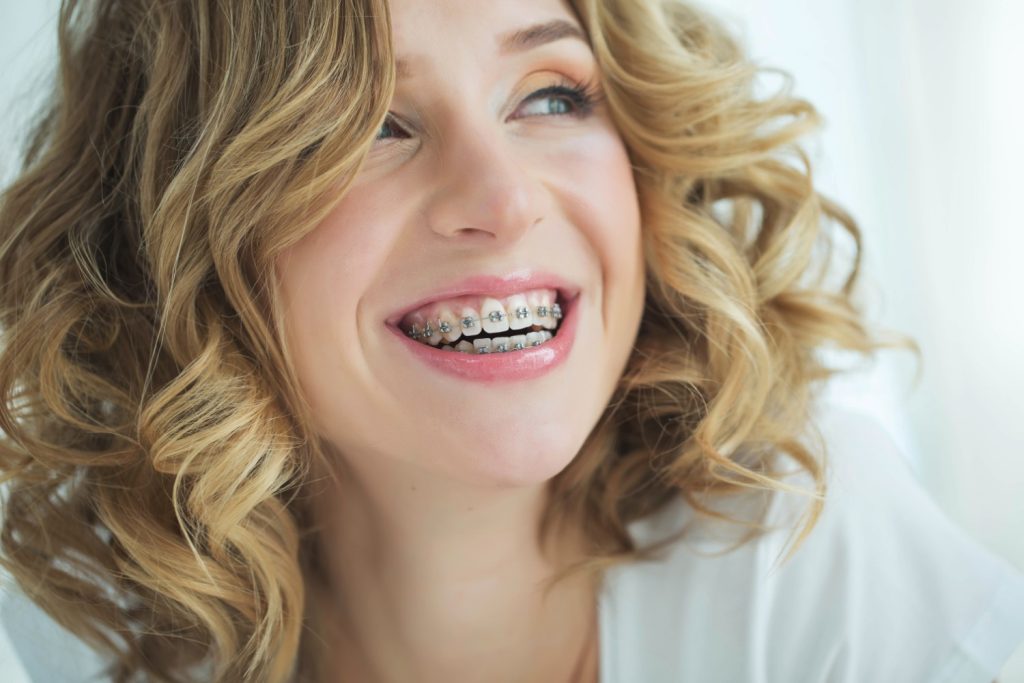
How to put rubber bands on braces
Orthodontic treatment with braces often requires the use of rubber bands to correct bite issues and align the teeth properly. Learning how to put rubber bands on braces is essential for anyone undergoing this treatment. This comprehensive guide will walk you through the steps, tips, and best practices to ensure you use rubber bands correctly and effectively.
Understanding the Role of Rubber Bands in Orthodontics
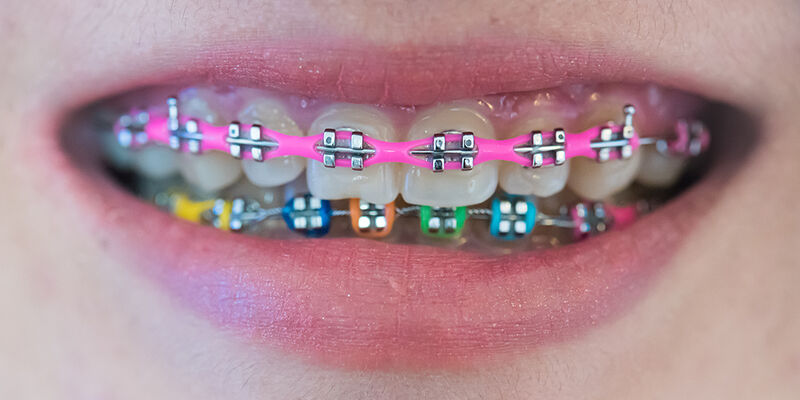
Rubber bands, also known as elastics, are an integral part of braces treatment. They apply additional force to move teeth and jaws into their desired positions, complementing the work of brackets and wires. Rubber bands are essential for:
- Correcting Bite Issues: They help correct overbites, underbites, crossbites, and open bites by connecting the upper and lower teeth.
- Aligning Teeth: Rubber bands aid in closing gaps and ensuring that teeth fit together correctly.
- Enhancing Treatment Effectiveness: They make it possible to achieve orthodontic goals more quickly and efficiently.
Types of Rubber Bands Used in Braces
Orthodontic rubber bands come in various types, each serving a specific purpose. The type of rubber band you will use depends on the specific orthodontic issue being addressed. Common types include:
- Class I Elastics: Used for closing gaps within the same jaw.
- Class II Elastics: Correct an overbite by moving the upper teeth backward and the lower teeth forward.
- Class III Elastics: Correct an underbite by moving the lower teeth backward and the upper teeth forward.
- Vertical Elastics: Also known as box elastics, they align the teeth vertically and help close open bites.
- Cross Elastics: Correct a crossbite by pulling the upper teeth inward and the lower teeth outward.
Step-by-Step Guide to Putting Rubber Bands on Braces
Proper placement of rubber bands is crucial for the effectiveness of your orthodontic treatment. Here’s a step-by-step guide on how to put rubber bands on braces:
Step 1: Understand Your Orthodontist’s Instructions
Before you begin, make sure you understand the specific instructions given by your orthodontist. They will provide details on:
- Which teeth the rubber bands should connect.
- The specific pattern or configuration for placement.
- How often to wear and change the rubber bands.
Step 2: Wash Your Hands
Good hygiene is important when handling orthodontic appliances. Wash your hands thoroughly with soap and water before touching your rubber bands.
Step 3: Gather Your Supplies
You will need:
- A clean pack of rubber bands (provided by your orthodontist).
- A small mirror to help you see what you’re doing.
- Orthodontic hooks or the brackets on your braces.
Step 4: Identify the Attachment Points
Using a mirror, identify the hooks or brackets on your braces where the rubber bands need to be attached. These are typically small protrusions on the brackets or special hooks designed for rubber band attachment.
Step 5: Place the Rubber Band on the First Hook
Start by hooking one end of the rubber band onto the first attachment point. Use your fingers or a small hook tool (if provided by your orthodontist) to help with placement.
Step 6: Stretch the Rubber Band to the Second Hook
Gently stretch the rubber band to the second attachment point, following the pattern or configuration prescribed by your orthodontist. Be careful not to overstretch or snap the rubber band.
Step 7: Secure the Rubber Band
Ensure that the rubber band is securely hooked onto both attachment points. It should be snug but not overly tight, providing the necessary force to move the teeth and jaws.
Step 8: Repeat for Additional Rubber Bands
If your treatment requires more than one rubber band, repeat the process for each one. Follow the specific placement instructions given by your orthodontist for each rubber band.
Tips for Effective Rubber Band Use
To ensure the best results from your orthodontic treatment, follow these tips for effective rubber band use:
- Wear Rubber Bands Consistently: Consistency is key to effective treatment. Wear your rubber bands as directed by your orthodontist, typically 24 hours a day, except when eating, brushing, or flossing.
- Change Rubber Bands Regularly: Rubber bands lose their elasticity over time. Change them at least once or twice a day to maintain the necessary tension and effectiveness.
- Handle with Care: Avoid snapping or overstretching the rubber bands, as this can cause them to break. Handle them gently when placing and removing.
- Keep Spare Rubber Bands Handy: Always carry spare rubber bands with you. If one breaks or becomes loose, replace it immediately to maintain consistent pressure on your teeth.
- Monitor Your Progress: Regularly check your teeth and braces in the mirror to ensure the rubber bands are correctly placed. Attend all scheduled orthodontic appointments to monitor your progress and make any necessary adjustments.
- Practice Patience: Placing rubber bands can be tricky at first, but practice makes perfect. Be patient and give yourself time to get used to the process.
Common Challenges and Solutions
Using rubber bands with braces can present some challenges. Here are common issues patients might face and solutions to address them:
- Discomfort: It’s normal to experience some discomfort when first using rubber bands. This discomfort typically subsides as your mouth adjusts. Over-the-counter pain relievers and orthodontic wax can help alleviate discomfort.
- Breakage: Rubber bands can break, especially if not handled gently. Always have spare rubber bands and replace them as soon as possible if they break.
- Difficulty in Placement: Some patients may find it challenging to place rubber bands correctly, especially in hard-to-reach areas. Using a mirror, practicing regularly, and asking for tips from your orthodontist can help.
- Forgetting to Wear Them: Consistency is crucial for effective treatment. Set reminders or associate wearing rubber bands with a routine activity, such as brushing your teeth, to help you remember.
Importance of Following Orthodontist’s Instructions
Adhering to your orthodontist’s instructions is vital for the success of your orthodontic treatment with braces and rubber bands. Here’s why:
- Ensuring Effectiveness: Following the instructions ensures that the rubber bands apply the correct amount of force to move the teeth and jaws effectively.
- Preventing Prolonged Treatment: Non-compliance can lead to extended treatment times. Wearing rubber bands as directed helps achieve the desired results within the expected timeframe.
- Avoiding Complications: Incorrect use of rubber bands can lead to complications, such as improper tooth movement or increased discomfort. Following instructions minimizes these risks.
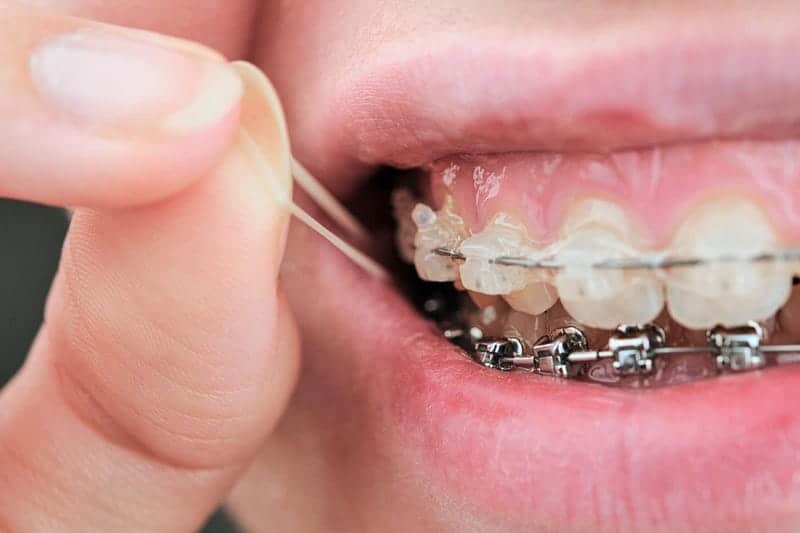
Maintaining Oral Hygiene with Rubber Bands
Proper oral hygiene is crucial when using rubber bands with braces. Here are some tips to keep your teeth and gums healthy:
- Brush Regularly: Brush your teeth at least twice a day with fluoride toothpaste. Use a soft-bristled toothbrush and brush gently around the brackets and along the gum line.
- Floss Daily: Flossing is essential to remove food particles and plaque between the teeth and under the wires. Use a floss threader or orthodontic flosser to make flossing easier.
- Use Mouthwash: Rinse with an antibacterial mouthwash to help reduce plaque and bacteria in hard-to-reach areas.
- Avoid Certain Foods: Avoid sticky, hard, and sugary foods that can damage the braces or increase the risk of cavities. Examples include chewing gum, caramel, hard candies, and popcorn.
- Stay Hydrated: Drink plenty of water to keep your mouth hydrated and help wash away food particles and bacteria.
- Attend Regular Check-Ups: Regular orthodontic check-ups are essential to monitor your progress and make necessary adjustments to your braces and rubber bands.
Common Myths About Rubber Bands and Braces
There are several misconceptions about the use of rubber bands with braces. Let’s debunk some of these common myths:
- Myth: Rubber Bands Are Optional: Some patients believe that rubber bands are optional and not necessary for their treatment. However, rubber bands play a crucial role in achieving specific tooth and jaw movements that brackets and wires alone cannot accomplish.
- Myth: Wearing More Rubber Bands Will Speed Up Treatment: Wearing more rubber bands than prescribed or doubling up can lead to excessive force, causing damage to the teeth and gums. Always follow the orthodontist’s instructions regarding the number and placement of rubber bands.
- Myth: It’s Okay to Skip Wearing Rubber Bands Occasionally: Inconsistent wear of rubber bands can delay treatment and affect the overall results. It’s important to wear them as directed, even if it’s inconvenient at times.
- Myth: Rubber Bands Are Only for Severe Cases: Rubber bands are used in a variety of orthodontic cases, not just severe ones. They are a versatile tool that can help achieve optimal alignment and bite correction in many different scenarios.
The Path to a Beautiful Smile
Learning how to put rubber bands on braces correctly is a vital part of the journey to achieving a beautiful, healthy smile. By following your orthodontist’s instructions, being consistent with wearing rubber bands, and maintaining proper oral hygiene, you can ensure the best possible outcome from your orthodontic treatment.
Rubber bands play a crucial role in correcting bite issues, aligning teeth, and enhancing the overall effectiveness of braces. While they may cause some discomfort initially, the benefits they provide in terms of faster treatment times and improved aesthetics make them an indispensable part of orthodontic treatment.
In conclusion, knowing how to put rubber bands on braces is essential for anyone undergoing orthodontic treatment. By understanding their role, following the step-by-step guide, and adhering to your orthodontist’s guidance, you can achieve the best results and enjoy a beautiful, confident smile.
Putting rubber bands (elastics) in braces is a straightforward process, but it’s essential to do it correctly to ensure effective treatment. Here’s a step-by-step guide:
- Choose the Correct Size: Your orthodontist will provide you with different sizes of rubber bands. Typically, there are small, medium, and large sizes. The size you use depends on your orthodontic needs and the instructions given by your orthodontist.
- Positioning: Rubber bands are usually attached to hooks on the brackets. Your orthodontist will instruct you on where to place the bands. Common configurations include attaching them from the upper to lower teeth or from hooks on the same arch to create specific forces for bite correction.
- Insertion: Using clean fingers or a special tool provided by your orthodontist, stretch the rubber band and hook one end onto the hook on the upper bracket. Stretch the other end and hook it onto the corresponding hook on the lower bracket. Make sure the rubber band fits snugly without overstretching it.
- Consistency: Follow your orthodontist’s instructions regarding when to wear the rubber bands. Some patients wear them full-time, while others may only wear them at night. Consistency is key to achieving the desired tooth movement and bite correction.
- Change Them Regularly: Rubber bands lose their elasticity over time, so it’s important to change them as recommended by your orthodontist. Typically, they should be changed daily or according to your orthodontist’s instructions.
- Oral Hygiene: Maintain good oral hygiene by brushing and flossing regularly. Rubber bands can trap food particles, so cleaning around them is essential to prevent decay and gum problems.
If you have any difficulty putting in your rubber bands or are unsure about the correct placement, don’t hesitate to ask your orthodontist or their staff for assistance. They can provide guidance and ensure you’re using the rubber bands effectively.
How to Put Rubber Bands Between Teeth?
Rubber bands between teeth, also known as interarch elastics, are used to create specific forces to move the teeth and align the bite. Here’s how to put them in correctly:
- Size Selection: Your orthodontist will provide you with the appropriate size of rubber bands for your treatment. They may vary in size and strength, so follow their instructions carefully.
- Placement: Interarch rubber bands are typically placed from one hook on an upper bracket to a hook on a lower bracket. Your orthodontist will show you where to place them to achieve the desired tooth movement and bite correction.
- Insertion: Using clean fingers or a rubber band hook tool provided by your orthodontist, stretch one end of the rubber band and hook it onto the upper bracket hook. Stretch the other end and hook it onto the corresponding lower bracket hook. Ensure the rubber band is securely attached without overstretching it.
- Wear Schedule: Follow your orthodontist’s instructions regarding when to wear the rubber bands. They may be worn full-time or only during certain times of the day or night. Consistency is crucial for effective treatment.
- Change Regularly: Rubber bands lose their elasticity over time, so change them daily or as instructed by your orthodontist to maintain effective tooth movement.
- Monitor Effectiveness: Pay attention to any discomfort or changes in how your teeth feel. Regular follow-up appointments with your orthodontist will ensure the rubber bands are working as intended.
If you have any questions or concerns about placing interarch rubber bands, don’t hesitate to consult your orthodontist. They can provide guidance and ensure you’re using them correctly to achieve your treatment goals.
Why Don’t I Have Rubber Bands on My Braces?
Not everyone with braces requires rubber bands (elastics). Several factors determine whether rubber bands are necessary for your orthodontic treatment:
- Orthodontic Needs: Rubber bands are primarily used to correct bite issues such as overbites, underbites, crossbites, or other types of malocclusions (bite misalignments). If your bite is already well-aligned and your orthodontist determines that rubber bands are unnecessary, they may not be prescribed for your treatment.
- Treatment Plan: Orthodontic treatment plans are highly personalized. Your orthodontist designs a plan based on your specific dental issues and treatment goals. If your braces treatment focuses solely on aligning your teeth without addressing significant bite discrepancies, rubber bands may not be required.
- Alternative Treatments: In some cases, alternative orthodontic appliances or techniques may be used instead of rubber bands to achieve the desired tooth movement and bite correction. Your orthodontist will recommend the most appropriate treatment based on your individual needs.
If you’re unsure why you don’t have rubber bands on your braces or have questions about your treatment plan, don’t hesitate to discuss it with your orthodontist. They can explain the rationale behind your specific treatment approach and address any concerns you may have.
How Fast Do Rubber Bands Move Teeth?
Rubber bands, or elastics, contribute to moving teeth by exerting gentle but continuous force on them. The speed at which rubber bands move teeth varies depending on several factors:
- Force Application: Rubber bands are designed to apply a specific amount of force to move the teeth gradually over time. The force is determined by the size and strength of the rubber bands prescribed by your orthodontist.
- Compliance: Compliance refers to how consistently you wear your rubber bands as instructed by your orthodontist. Proper and consistent wear is essential for effective tooth movement. If rubber bands are worn as directed, teeth can move at a steady pace.
- Individual Response: Each person’s teeth and bone structure respond differently to orthodontic forces. Some individuals may experience faster tooth movement with rubber bands, while others may require more time to achieve the desired results.
- Treatment Goals: The speed of tooth movement with rubber bands also depends on the specific orthodontic goals of your treatment. Complex bite issues may require longer treatment times with rubber bands compared to simple tooth alignment.
- Monitoring and Adjustments: Your orthodontist will monitor your progress regularly and make adjustments to the size and configuration of the rubber bands as needed. This ensures that tooth movement progresses effectively and aligns with your treatment plan.
Overall, while rubber bands contribute to moving teeth, the exact speed of tooth movement varies depending on individual factors and treatment specifics. Adhering to your orthodontist’s instructions and attending regular appointments will help ensure that your teeth move at an appropriate and effective pace towards achieving a straight and healthy smile.